Setting up Your Removable and Fixed Cases for Success
If you’ve ever been in the middle of a home improvement project and had to stop and find parts you didn’t know you needed, you’ve felt the irritation at having your workflow disrupted.
While a trip to the home improvement store in the middle of a project is merely annoying, in your dental practice, that workflow doesn’t bode well for production or happy patients!
Successful case management includes selecting the correct armamentarium before you get started.
Once your patient has accepted treatment and scheduled their start, knowing what you’ll need and having it in your office ahead of time will alleviate unnecessary stress on appointment day. Thus, knowing how to select the correct LOCATOR® abutments for implant-retained dentures and fixed dentures is crucial.
Selecting Locators for Removable and Locator Fixed Dentures
No matter which implants you place (or which implants were placed elsewhere) you’ll be glad to know that Zest Dental Solutions makes LOCATOR abutments for nearly every implant system.
With only three pieces of information, it’s easy to select the correct LOCATOR abutment for your patient to help ensure a properly fitting implant-retained denture or fixed prosthesis.
Here are the 3 things you need to select your abutment:
1. The Implant Manufacturer
If you inherited the case and the patient isn’t able to get this information from their previous dentist, it can feel a bit like detective work. While there are online resources that are helpful, such as What Implant Is That?, you can also reach out to your clinical representative for help. Oftentimes, a horizontal radiograph that clearly shows the threads and apex of the implant is enough to identify it. Don’t hesitate to ask!
2. The Specific Implant or Implant Connection Type
Once you know the implant manufacturer, you’ll need to know the connection type for the implant. (E.g. conical, NP, RP, etc.) Most implant manufacturers make several different implants with several different connections. This is essential to selecting the LOCATOR with the connection that matches the specific implant you’re working with.
3. Cuff Height
Finally, you’ll need to know the cuff height to order the correct corresponding LOCATOR height. The cuff height is the distance in millimeters from the platform of the implant to the highest point of the gingival tissue.
How to Select Your Abutment Height (Cuff Height)
To choose the correct LOCATOR abutment height, you’ll need to measure the height of the gingiva above each implant. Measuring cuff height only takes a few minutes of total chair time.
Follow these steps for each implant to quickly and accurately measure your cuff heights:
- Remove any healing caps or existing old LOCATORS to expose the platform of the implant.
- Using a periodontal probe, walk the probe around the circumference of the platform and note the measurement from the platform to the highest point of the gingiva. This is your cuff height. For example, if the platform to the top of the gingiva is 3mm on the mesial side of the implant, but 4mm on the distal side, you’ll record 4mm as your cuff height.
- Replace the healing cap or old LOCATOR abutment to prevent the gingival tissue from collapsing over the implant while waiting to deliver the new LOCATORS.
Avoid the common error of “adding” to your LOCATOR height! It’s not necessary to add to the cuff height when you choose your LOCATOR abutment height. When you order a 3mm abutment, the total height will be 4.5mm. 1.5mm will extend above the gingiva. Simply order the exact height that you measured and the abutment will sit properly above the tissue.
Feel free to download our printable PDF guide here. Or if you prefer, you can watch Dr. Michael Scherer measure tissue height in the video below:
How to Order a LOCATOR Abutment
The Zest Dental Solutions website makes searching for and ordering your LOCATOR abutments easy.
From the homepage, click on Shop Now under “LOCATOR”.
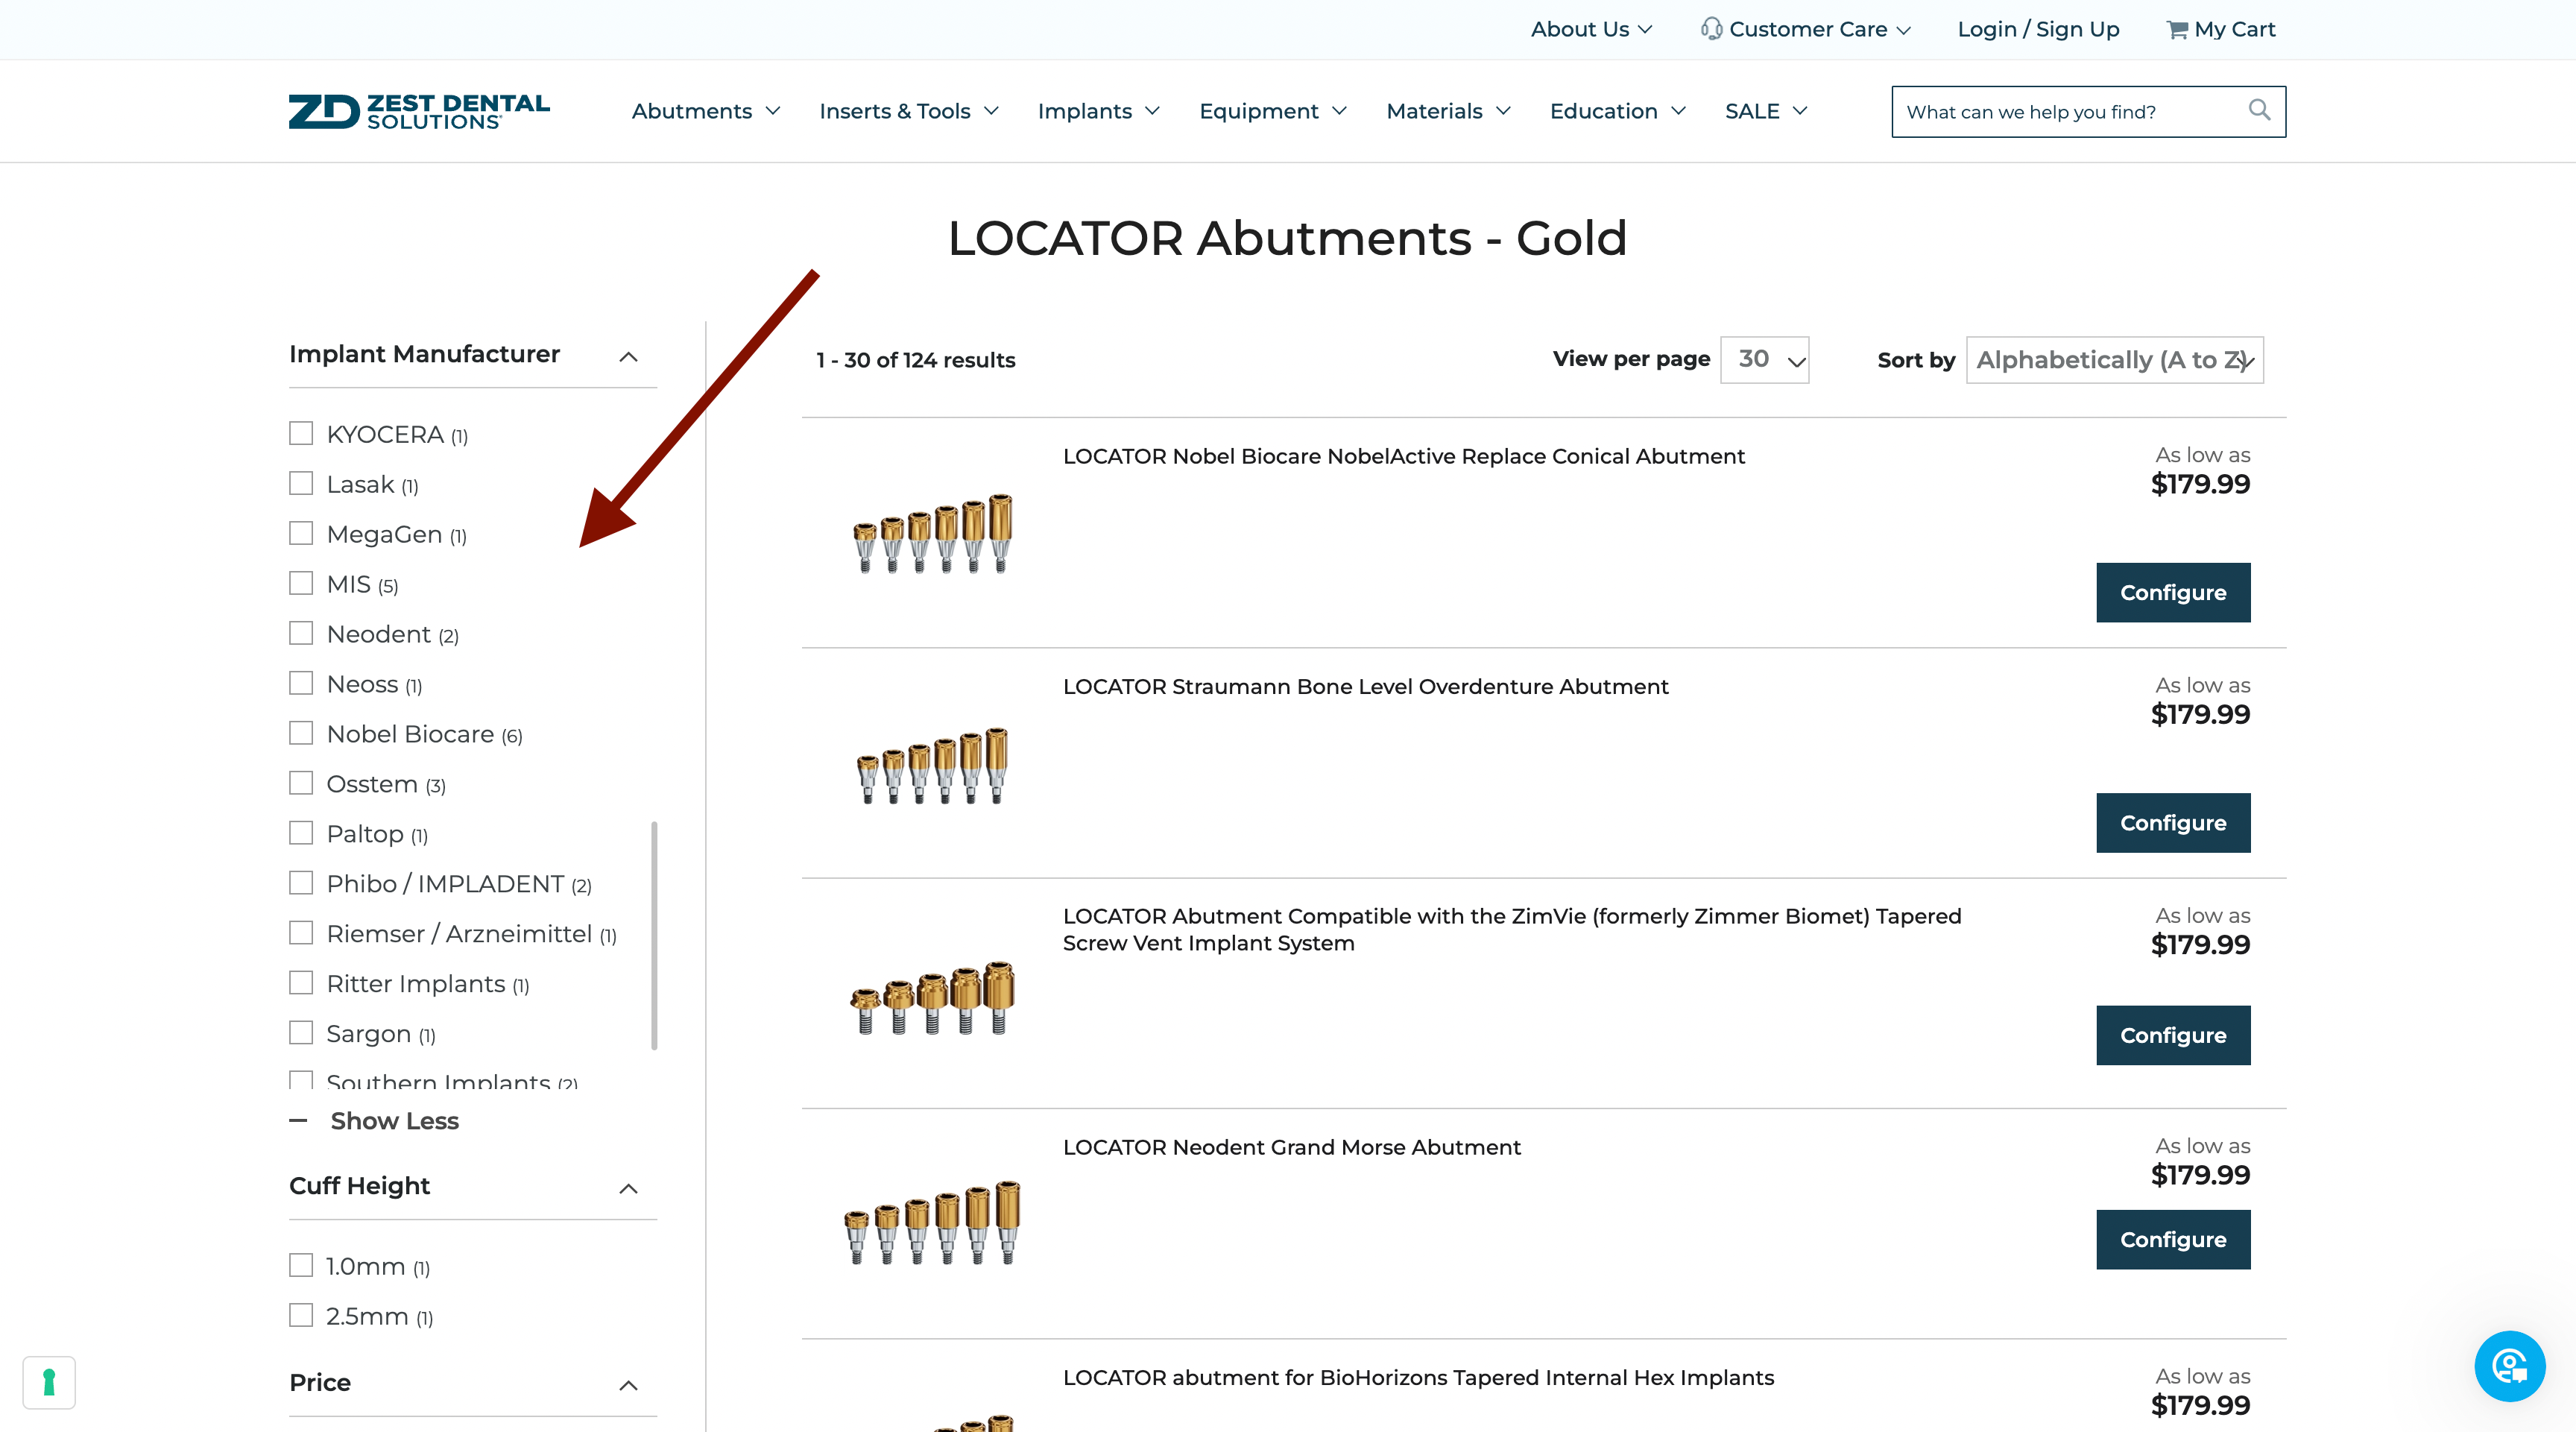
From this page, choose the implant manufacturer on the left side of the screen.

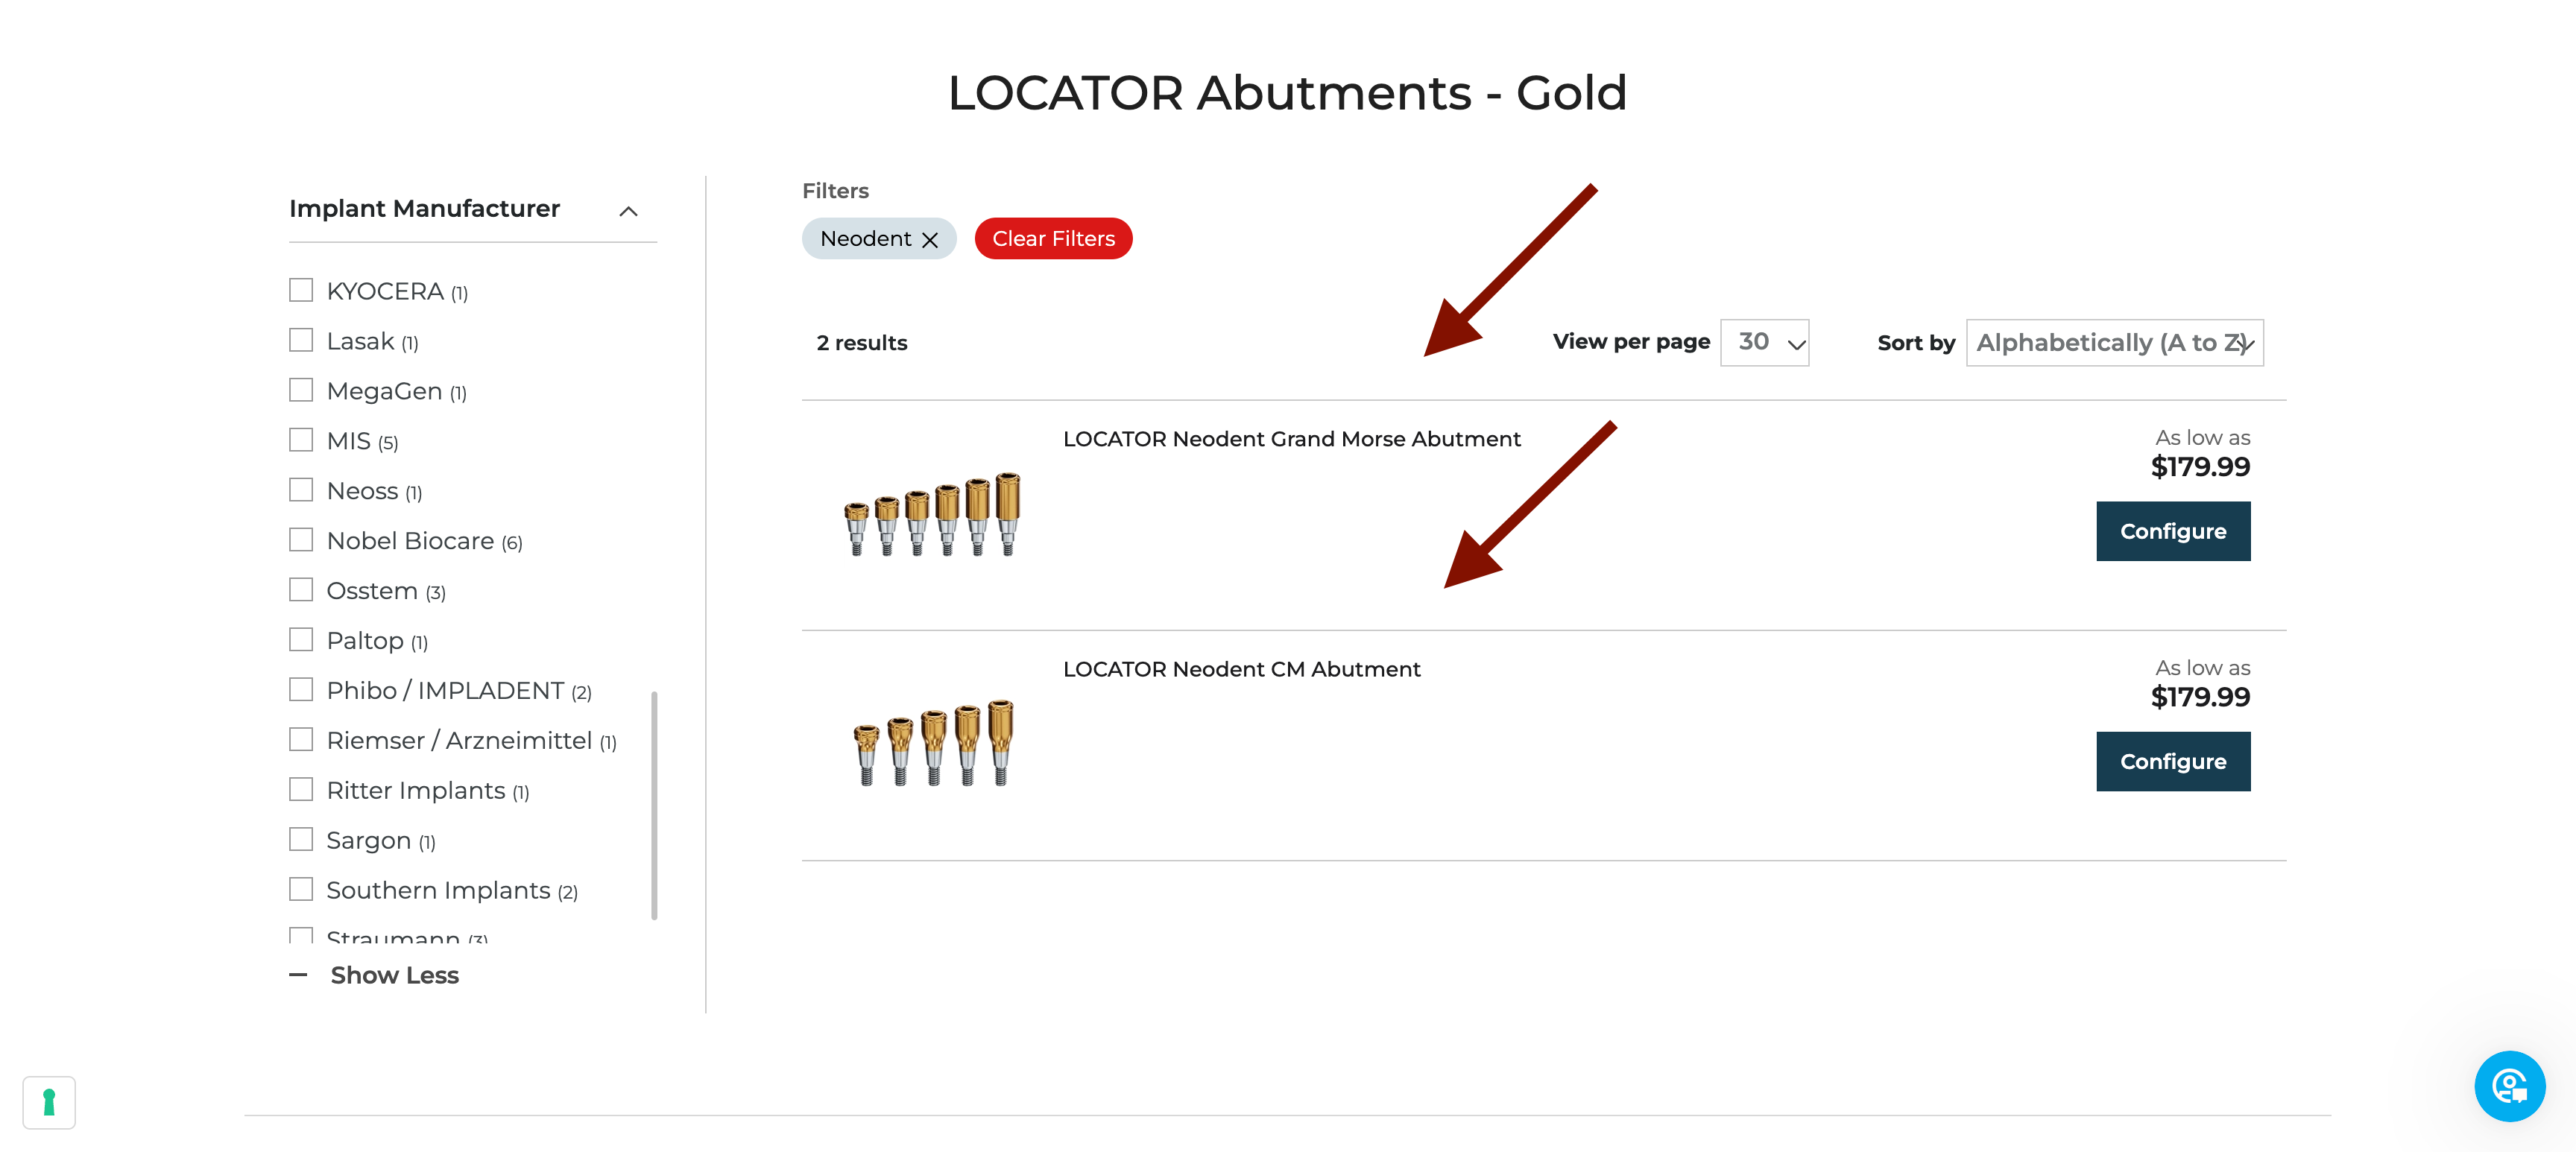

Next you’ll narrow the search and select the specific type of implant or connection for your implant.
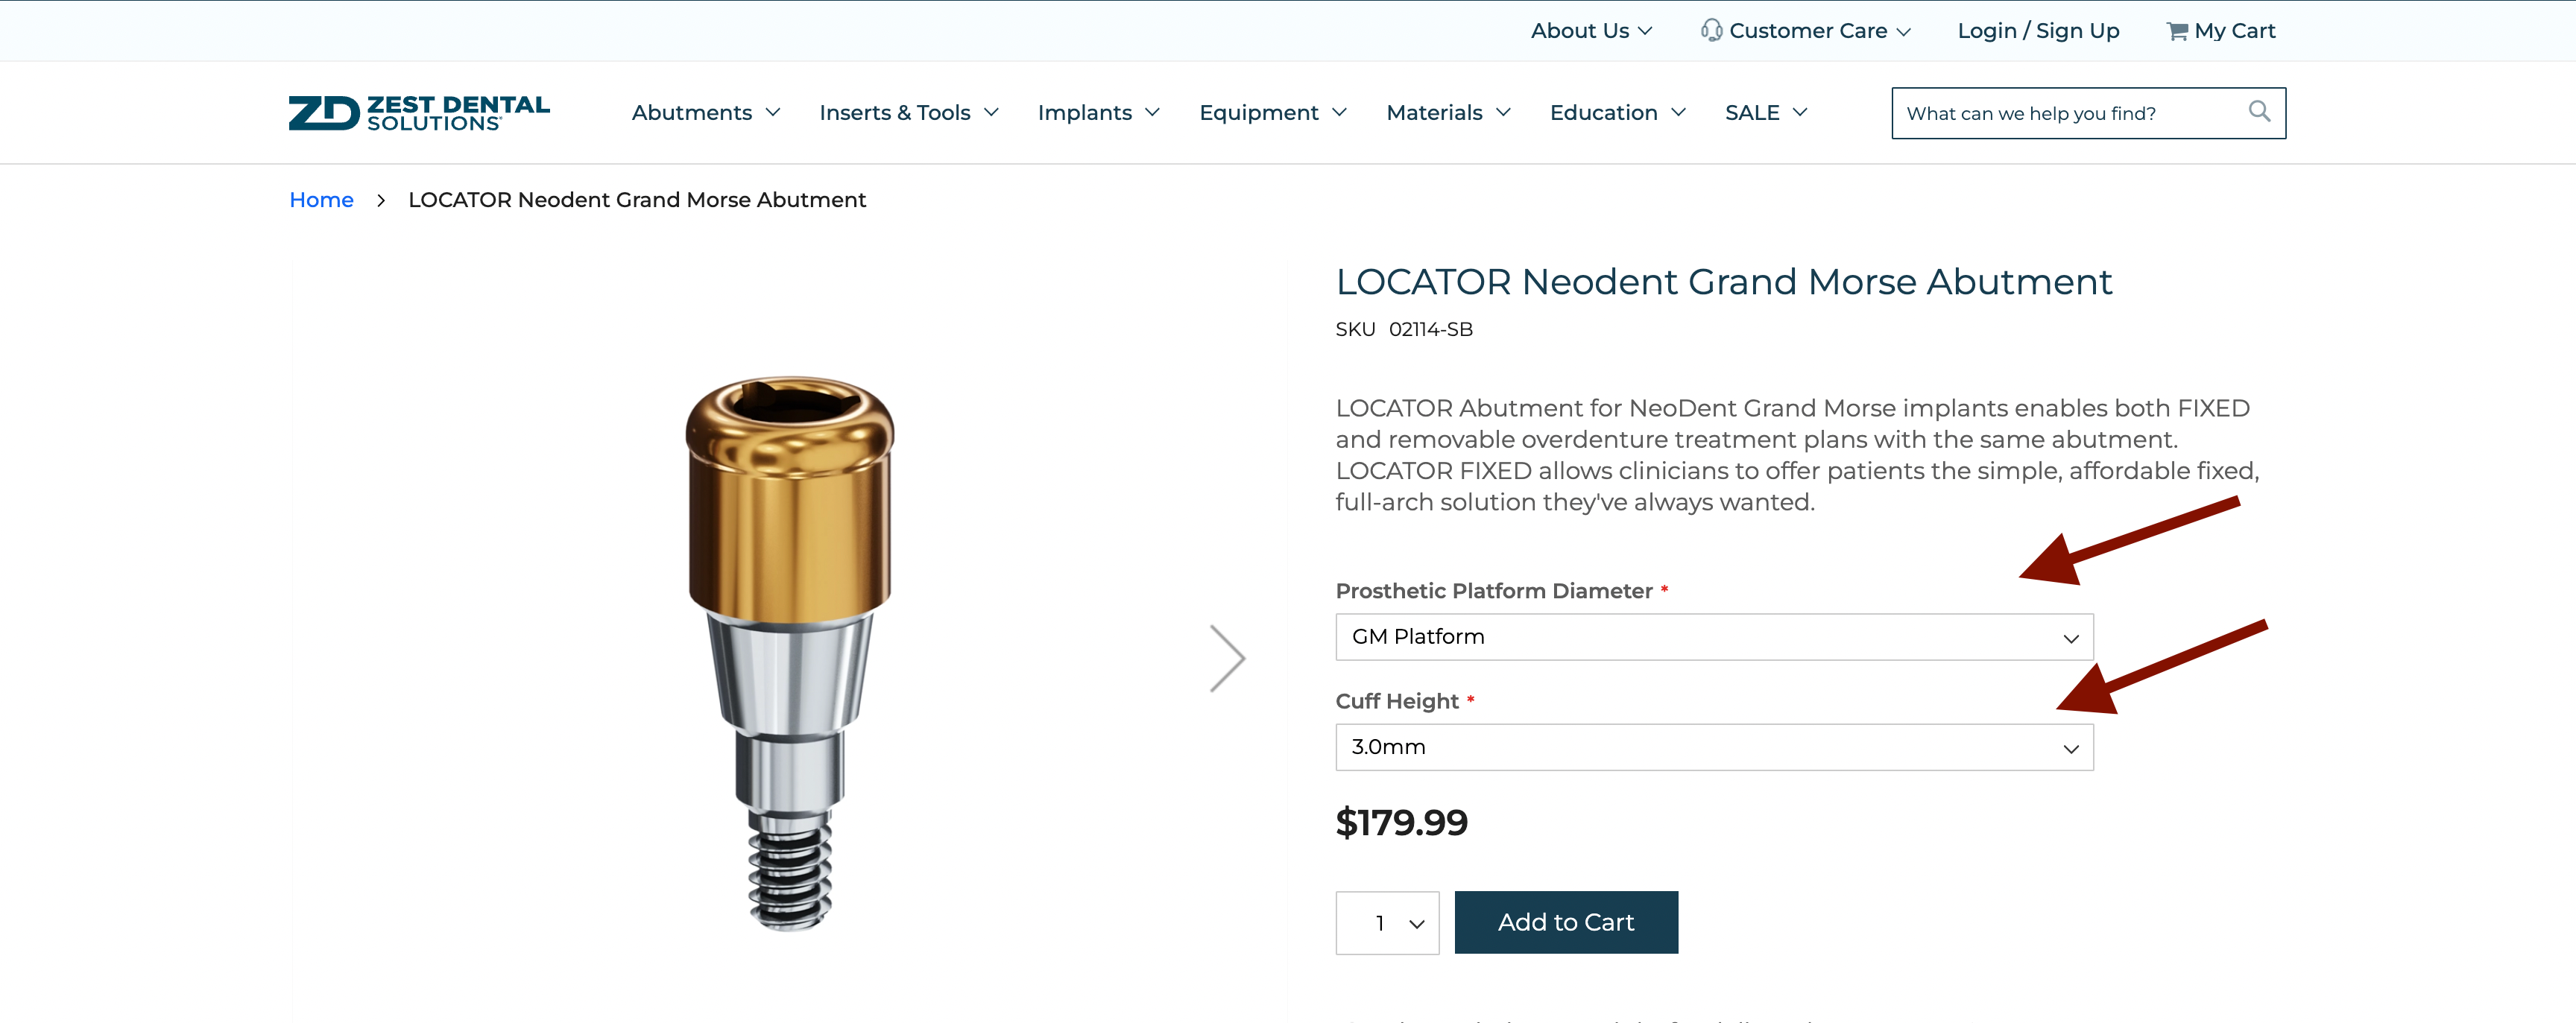
Once you’ve chosen the specific implant and connection, you’ll have the option to “configure.” Click on “configure” and select the platform and cuff height for that specific implant.

LOCATORS for Removable Overdentures vs. LOCATOR FIXED®
One of the best things about LOCATOR FIXED is that it uses the exact same original LOCATOR abutment that works for an implant-retained overdenture.
LOCATOR FIXED components differ from LOCATOR Removable only within the prosthesis itself. The denture caps (housings) and retention inserts are what make the denture either fixed or removable.
That means that if your patient is currently wearing a removable overdenture and they have Zest LOCATOR abutments on at least four implants, you can convert their overdenture to a Fixed denture using the exact same abutments. (We think that’s pretty amazing!)
After you’ve selected your abutment, it’s time to select your retention inserts. If you could use a few pointers on that topic, be sure to keep your eyes peeled for an upcoming blog post on selecting the correct retention inserts.
In the meantime, if you have any further questions about measuring cuff height or selecting the correct abutment, don’t hesitate to contact our customer support. We’re here for you!
You’re on a Roll – Keep the Education Going!
If you’ve found this blog helpful and would like to keep learning more about our products and how best to prepare your cases, we also offer a variety of Continuing Education opportunities. From webinars and in-person lectures to ZestMasters and more, we have the CE credits and resources you need to advance your career, grow your network, and find success. We look forward to welcoming you into our community and can’t wait to help support your career development.
